The following sections present a step-by-step tutorial guide to using Xtla for some common tasks: registering an archive, bookmarking an existing project, creating your own local branch, getting a working tree, merging patches from the main branch and committing changes to your tree.
For the purposes of this tutorial, we will use the Xtla project as an example of a project you might like to track (humour me).
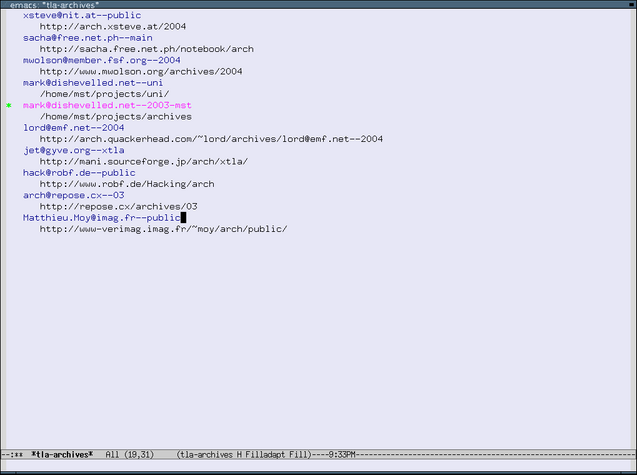
The first step in tracking a project's development is to register its archive in your archive list. You can do this by starting the archive browser ("C-x T A") and typing "a r" to register a new archive. Xtla's archive location is currently http://www-verimag.imag.fr/~moy/arch/public/, and the default value for the archive name will be fine. Having done this, you should now see the newly-registered archive listed.
The normal usage of Xtla is to create a bookmark for each version of a project you are currently interested in. Much of the arch's functionality is available from the bookmarks buffer, and it is one of the primary entry points for Xtla.
To track Xtla's development, you will most likely want to add a bookmark for its main development line. You can do this by entering the bookmarks buffer ("C-x T b") and adding a new bookmark with ("a b", or "add bookmark"). You should be prompted for a version name, and you can use tab completion to enter Matthieu.Moy@imag.fr--public/xtla--main--0.1. You can give your bookmark any name you like.
Pressing "RET" on your newly-added bookmark will show you a revision list for that version. You can use this list to browse archive logs ("RET" again), view changesets ("=") and various other tasks.
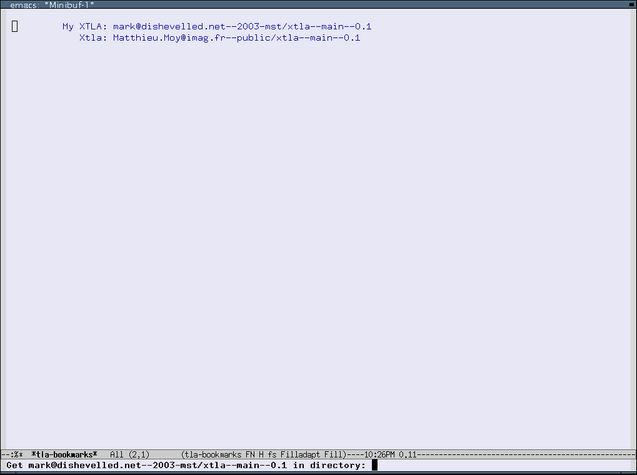
Having created a bookmark for the Xtla project, you are ready to create your own branch. Again from the bookmarks buffer ("C-x T b"), move the point to your bookmark for Xtla and hit "M T". You will be prompted for the tag version to be created for your new branch. Put the branch somewhere in your default archive (I put mine in mark@dishevelled.net--2003-mst/xtla--main--0.1.) This will create a tag of the main Xtla project in your own archive and add a bookmark for it.
Your newly-added bookmark will be marked as a "partner" of your main Xtla bookmark. This records the fact that the two projects are related so that Xtla can show you which patches from the Xtla mainline are missing from your local tree, and other useful stuff (more on this later).
At this point, you will probably want to get a project tree for your new branch. You can do this by moving your point to its bookmark in the bookmark buffer, and hitting ">". You will be prompted for a directory in which to place the project tree, and the revision to get (the default is fine in this case). Once the project tree has been fetched, it will be automatically opened in dired.
Before you start making changes, it is a good idea to see if any new patches have been added to the mainline since you last checked. Xtla is particularly good at doing this.
Start by entering the bookmarks buffer ("C-x T b"), move your point to the bookmark of your Xtla branch and hit "M m". A *tla-missing* buffer should appear, and show any patches that are in the mainline but not in your tree.

To merge all missing patches from the Xtla mainline into your project tree, move your point to the Xtla mainline partner entry and hit "M s". You will be prompted for the path of your local project tree, and after the patches have been merged a changes buffer should be displayed.
If you don't want to merge all the missing patches, you can leave off the "M" prefix. For example, "r" will replay only the revision under the point (allowing you to cherry-pick patches), and "s" will star-merge all missing patches up to the patch under the point.
After making changes to your project tree, you are ready to commit. You can review your changes by typing "C-x T =" from within your project tree, and a *tla-changes* buffer should appear with diff output. Before committing, you might also like to tree-lint your local tree by hitting "C-x T l" (but this is done automatically if tla changes fails and suggests a tree-lint).

Once you are satisfied with your changes, you can create a log file by hitting "C-x T c" (or simply "c" from your *tla-changes* buffer). Many users prefer to write their log file incrementally, and you can always save this file and hit "C-x T c" to return to it later. You can also add a Changelog-style entry by hitting "C-x T a" from the project tree file you are currently visiting.

To commit your changes, type "C-c C-c" from your log buffer.